Before + After Lightroom Edit with Missy Mayo
One of my favorite photography pleasures is gaining insight into how other photographers edit images. Aside from learning new editing tricks, I love to crawl into a creative’s mind and understand their approach to improving an image. Personally, I am a fairly clean editor with a penchant for color, but sometimes I believe it is almost harder to make an image appear natural rather than dramatically manipulated.
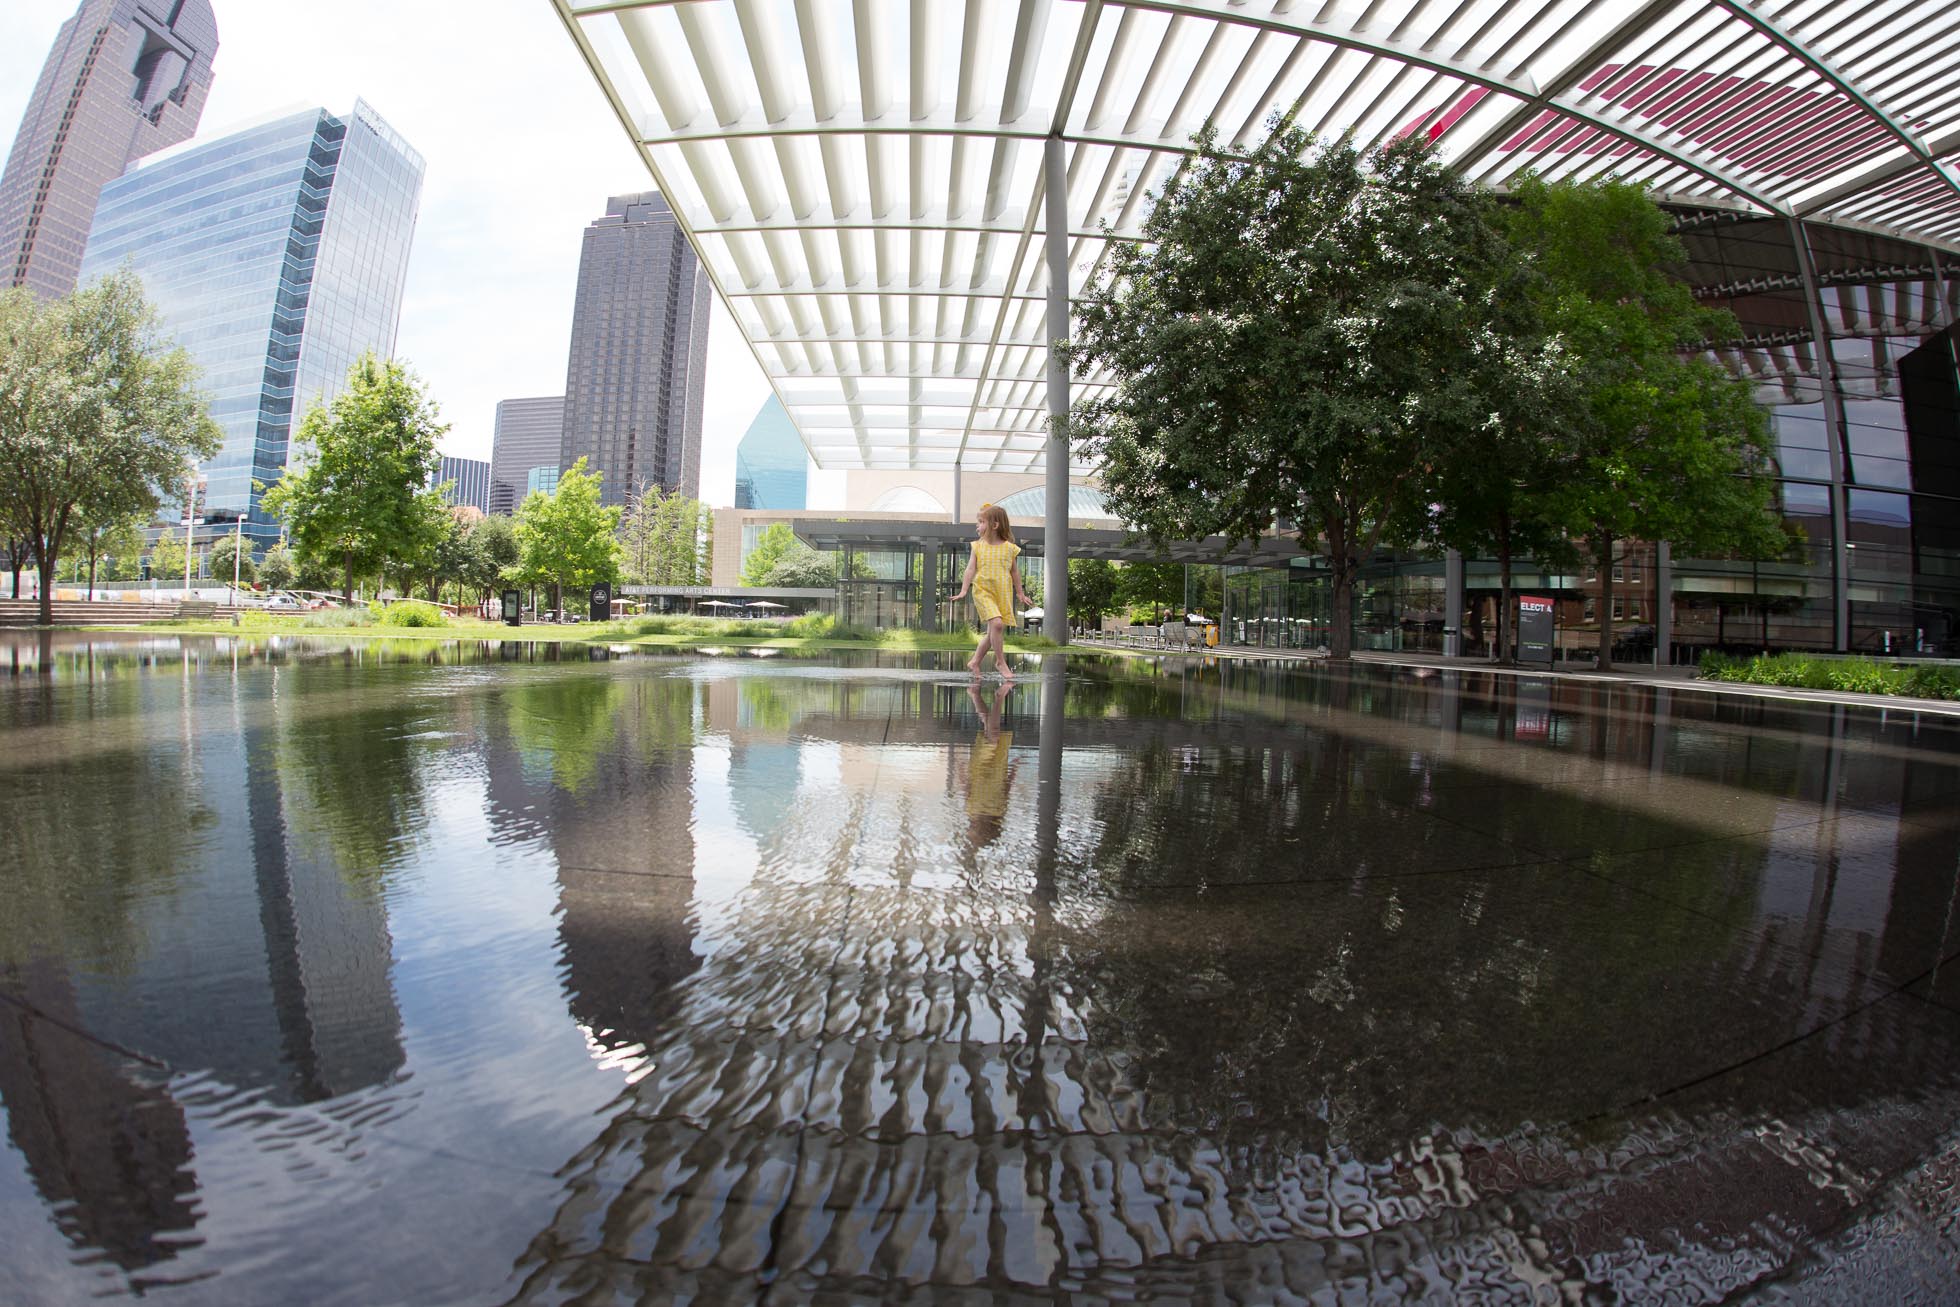
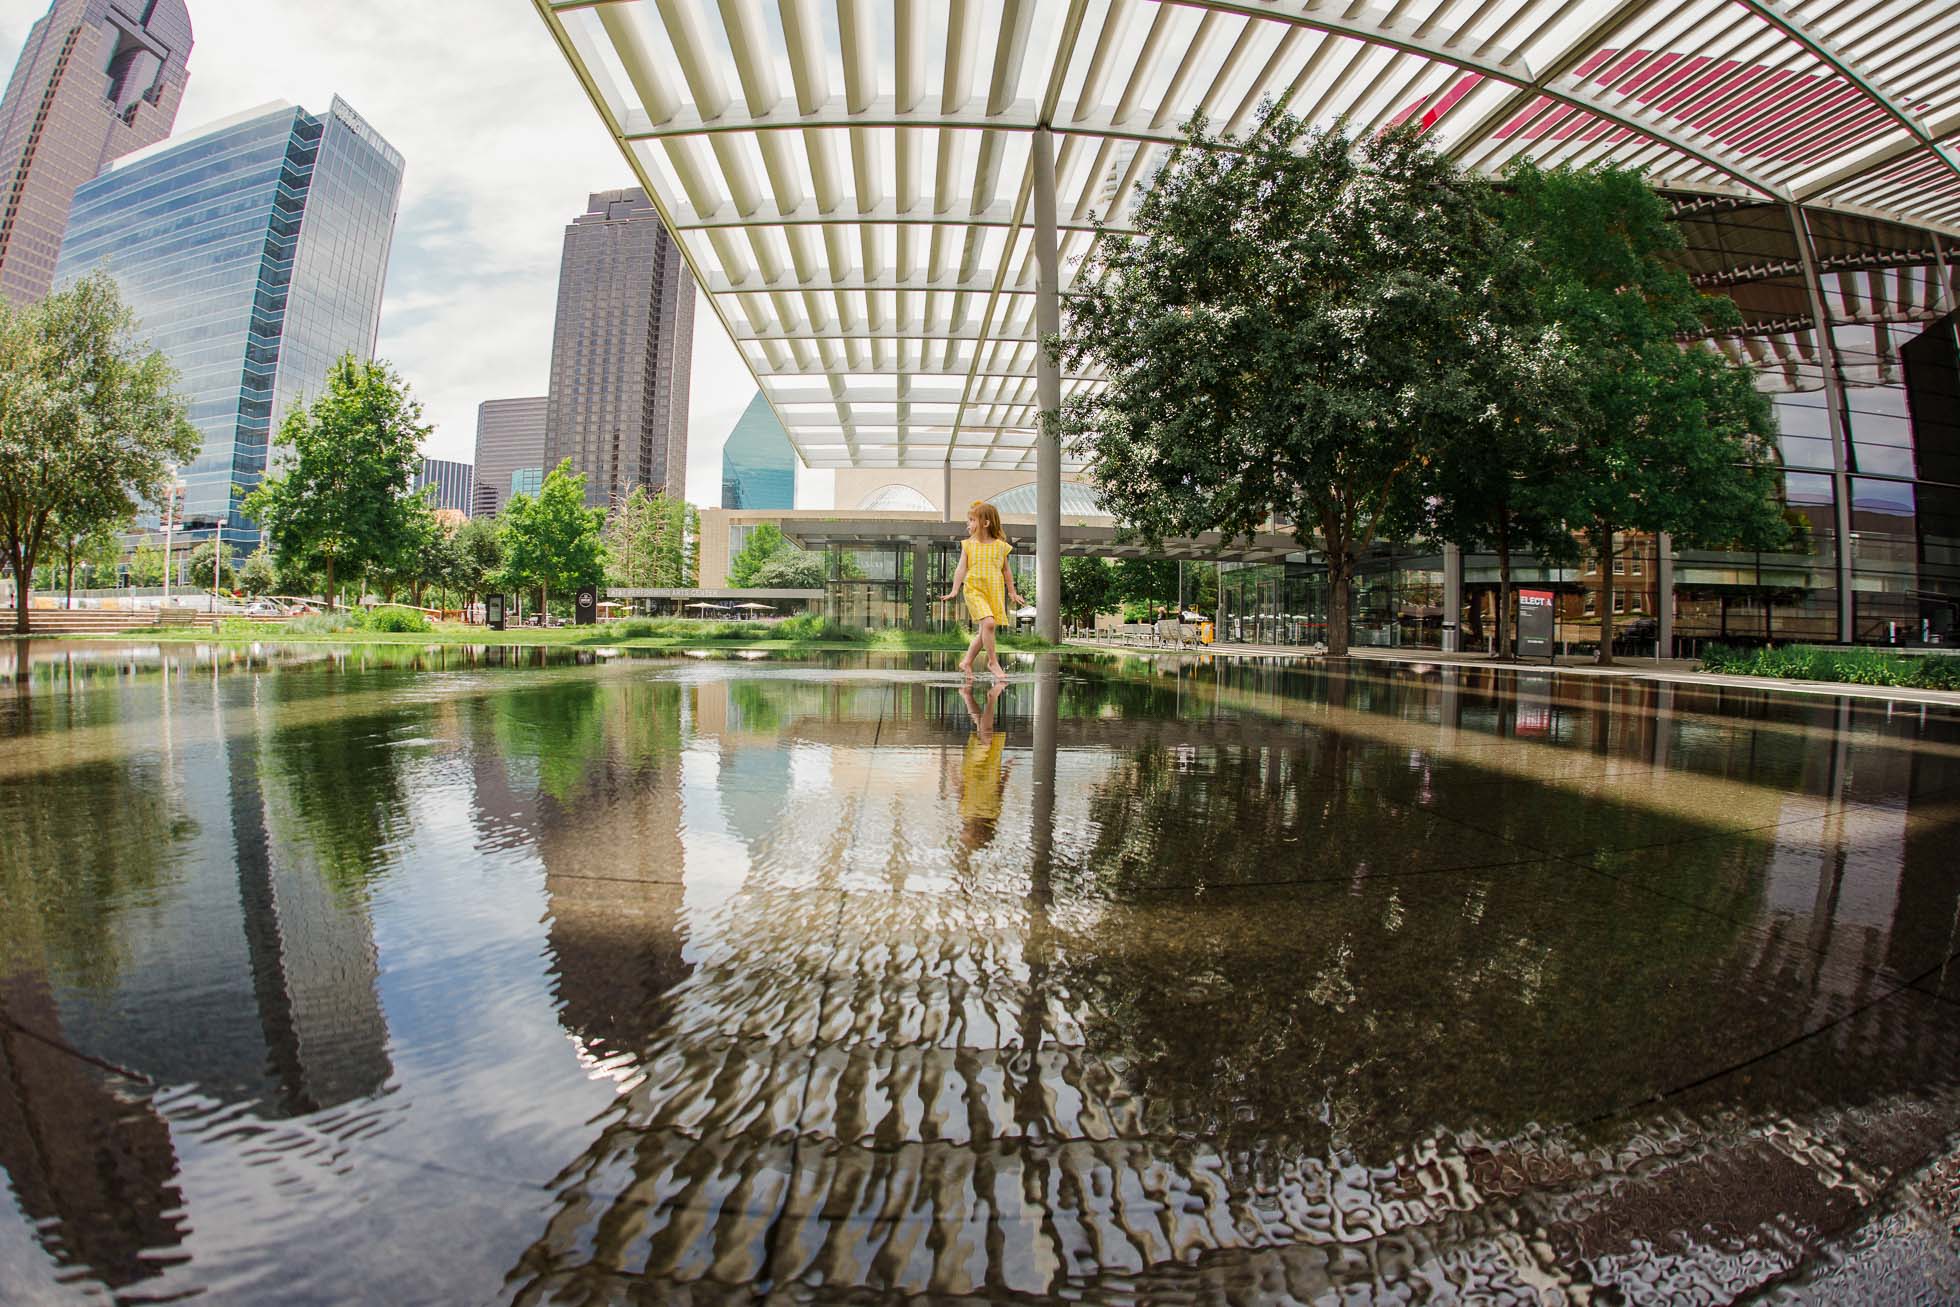
The image below is a RAW file that I shot of my daughter awhile back. It was taken with a 15mm fisheye lens at f5.0, 1/800sec, ISO320. I think it has a lot of potential – but as of now it looks pretty flat and uninteresting.
My main goals in editing this image are to play up the light and shadows, increase the color oomph, and draw attention to my daughter in the middle. I will be editing solely in Adobe Lightroom, although the same concepts apply if you use Adobe Camera Raw.
To start I work in the basic adjustment panel and adjust the white balance by adding yellow. I also bring the highlights down to the maximum amount to try to “save” the sky. I bump the shadows up a tad so that the right side of the image is a bit more balanced as compared to the left. Finally, I add a tiny bump of vibrance and saturation to improve the color.
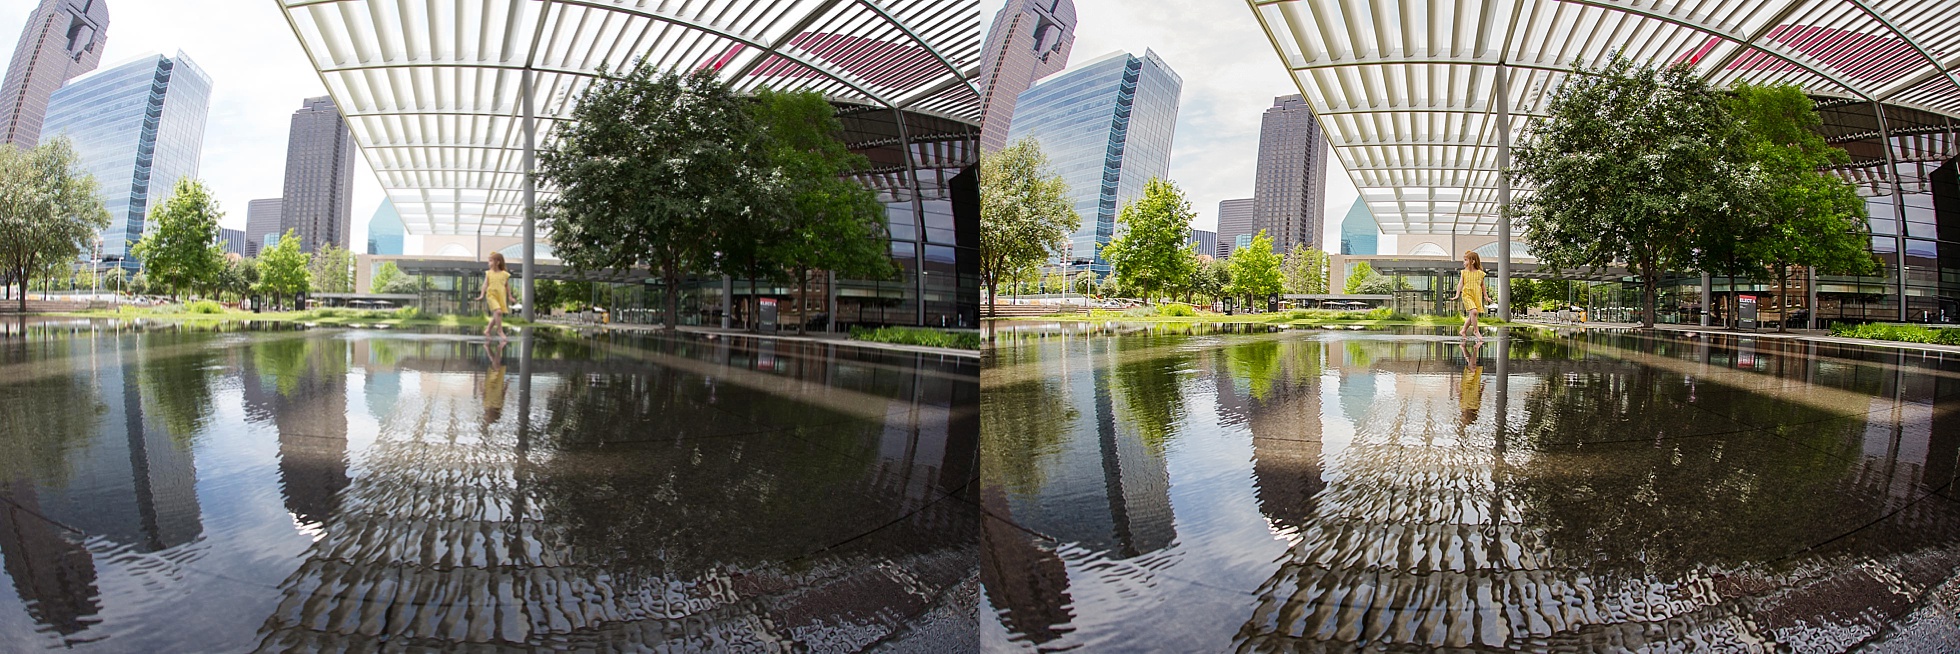
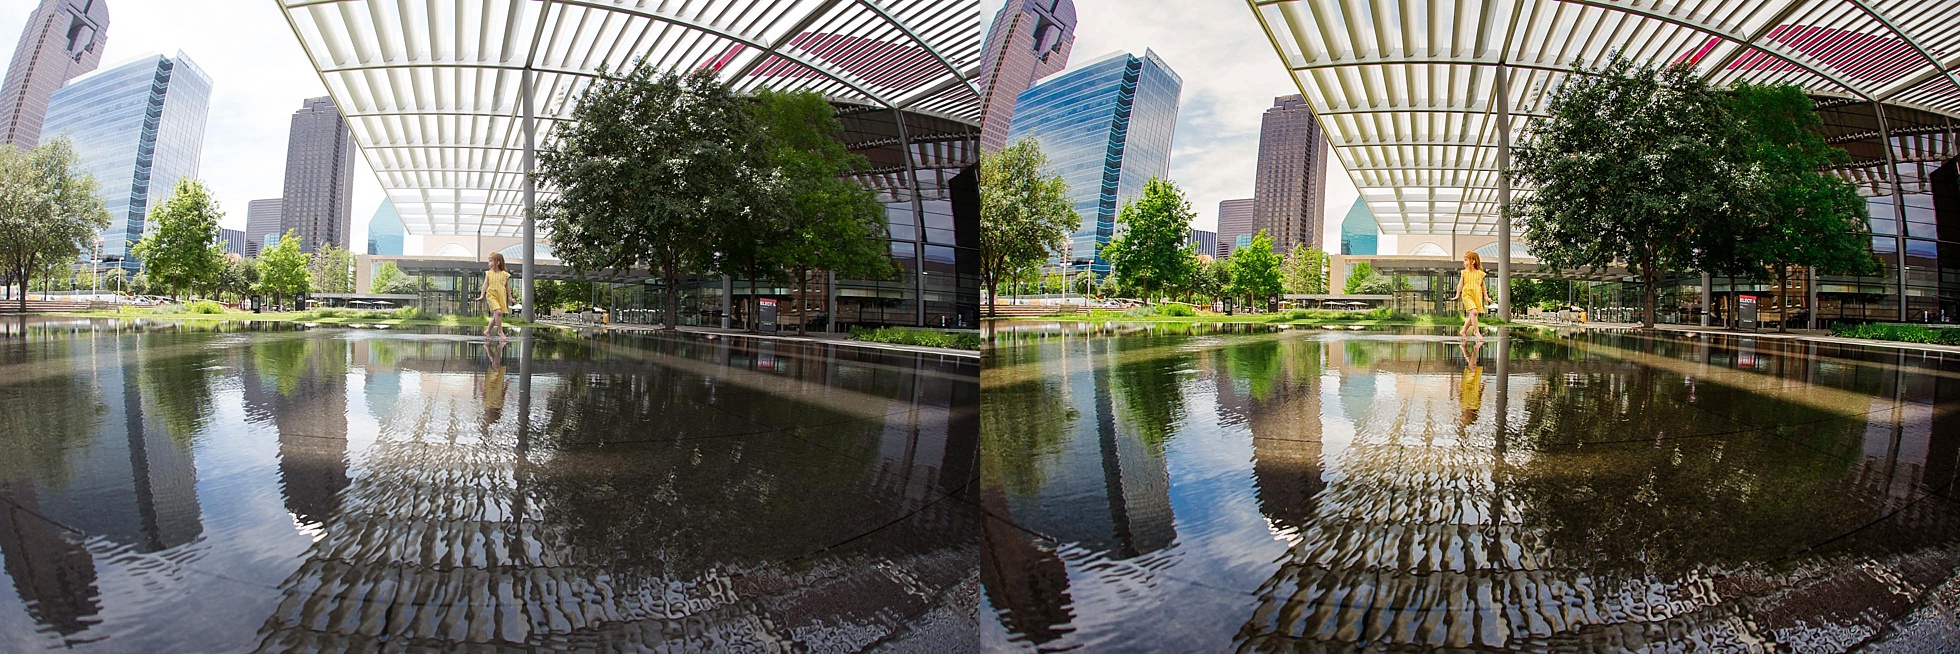
The difference is small, but definitely noticeable.
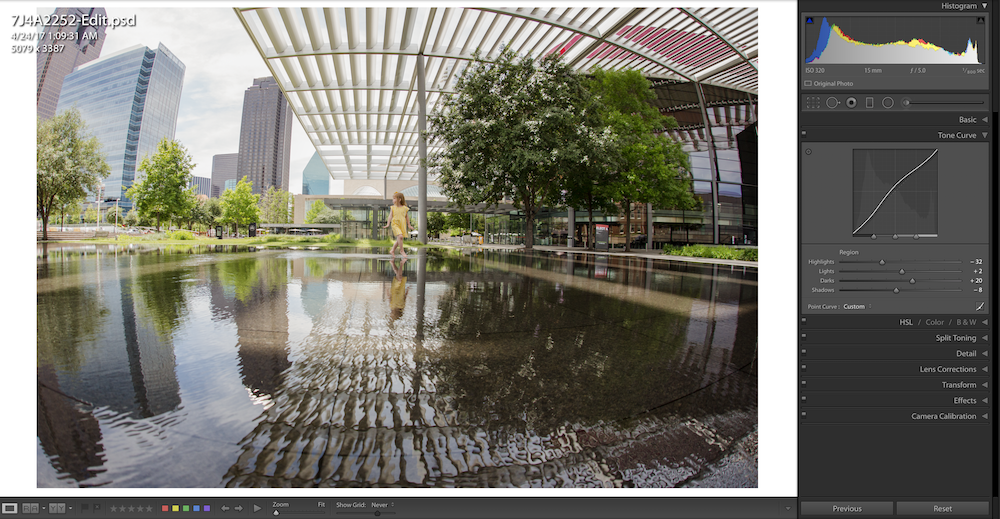
Next, I want to work on the contrast of the image. Personally, I rarely use the contrast slider in the Basic Panel. I feel that it often makes my darker tones clipped (so dark that they lose all noticeable detail) very quickly. Instead, I rely on the tone curve panel to make adjustments. I apply a very slight “S” curve, which means that I pulled the left side of the histogram down to deepen the shadows and pulled the middle of the histogram curve up to brighten the midtones.
Now I can really see a difference!
Things still look a bit flat, so I go back to the Basic Panel and add a touch (+15) of clarity. Generally, clarity is avoided on portraits because it magnifies flaws, desaturates, and causes skin to look awful, but since my subject is only a tiny portion of the image a bit of clarity is ok.
My next step is to work on the global color adjustments of the image. I love that my daughter is wearing a yellow dress and I want the viewer’s eye to be drawn to her. However, the yellow-green of the grass in the back detracts from her. In the HSL panel I decrease the saturation and luminance (brightness) of the greens significantly. By sliding the hue of the greens to the right, I lessen the yellows and add a bit of cyan. I want to increase the yellows to help her dress, but this causes the grass to become saturated again so I will choose to make that change with a brush. To pop the skin, I increase the luminance of the oranges and yellows. My final step in the HSL panel is to increase the saturation of the blues and bring down the luminance to make the building pop a bit more.
In the brush panel (the shortcut is K), I run one of my favorite brush presets – my “subject illuminator.” I love to make my subjects pop from the background and the secret to doing this is creating a nice contrast of whites, blacks, and shadows on your subject. I also run this brush over a few areas of the water just to liven them up a bit.
You will notice that I have named this brush preset with a number “1” in front – this is a time saver! All I need to do is click on the dropdown effect and then type the “1” to avoid scrolling to find my preset. Easy peasy!

My final step is to work on emphasizing the sunlight that is shining down on her from the top left of the image. I plan to use the Radial Filter (the shortcut is shift + m) help me achieve this. My first step is to create a long oval that follows the sunlight’s path to the middle. I start with the same adjustments from my “subject illuminator” but also a touch of yellowy-peach to the color.
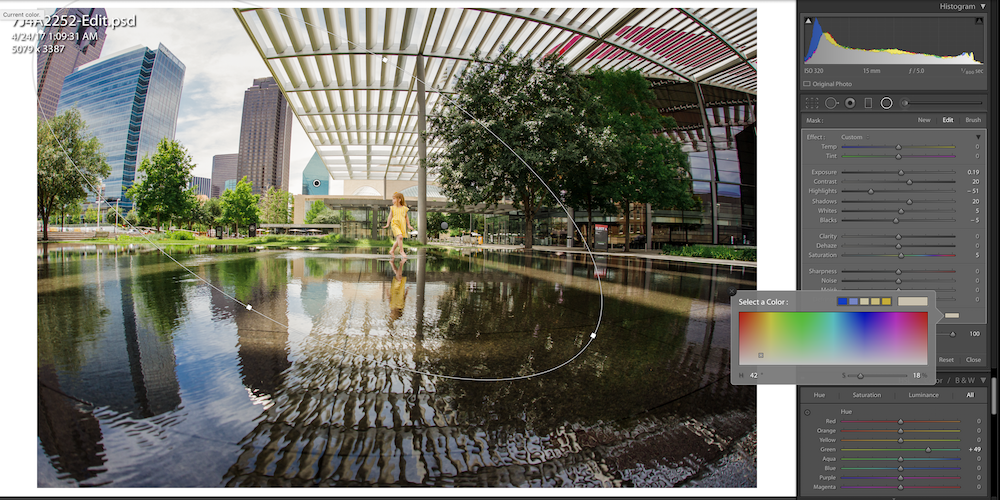
To add a natural vignette I add a second gradual filter around my subject and use it to bring down the exposure and blacks a touch.
My final step is to double check the detail panel and look at the sharpening/noise reduction settings. For both, the standard Lightroom settings are sufficient.
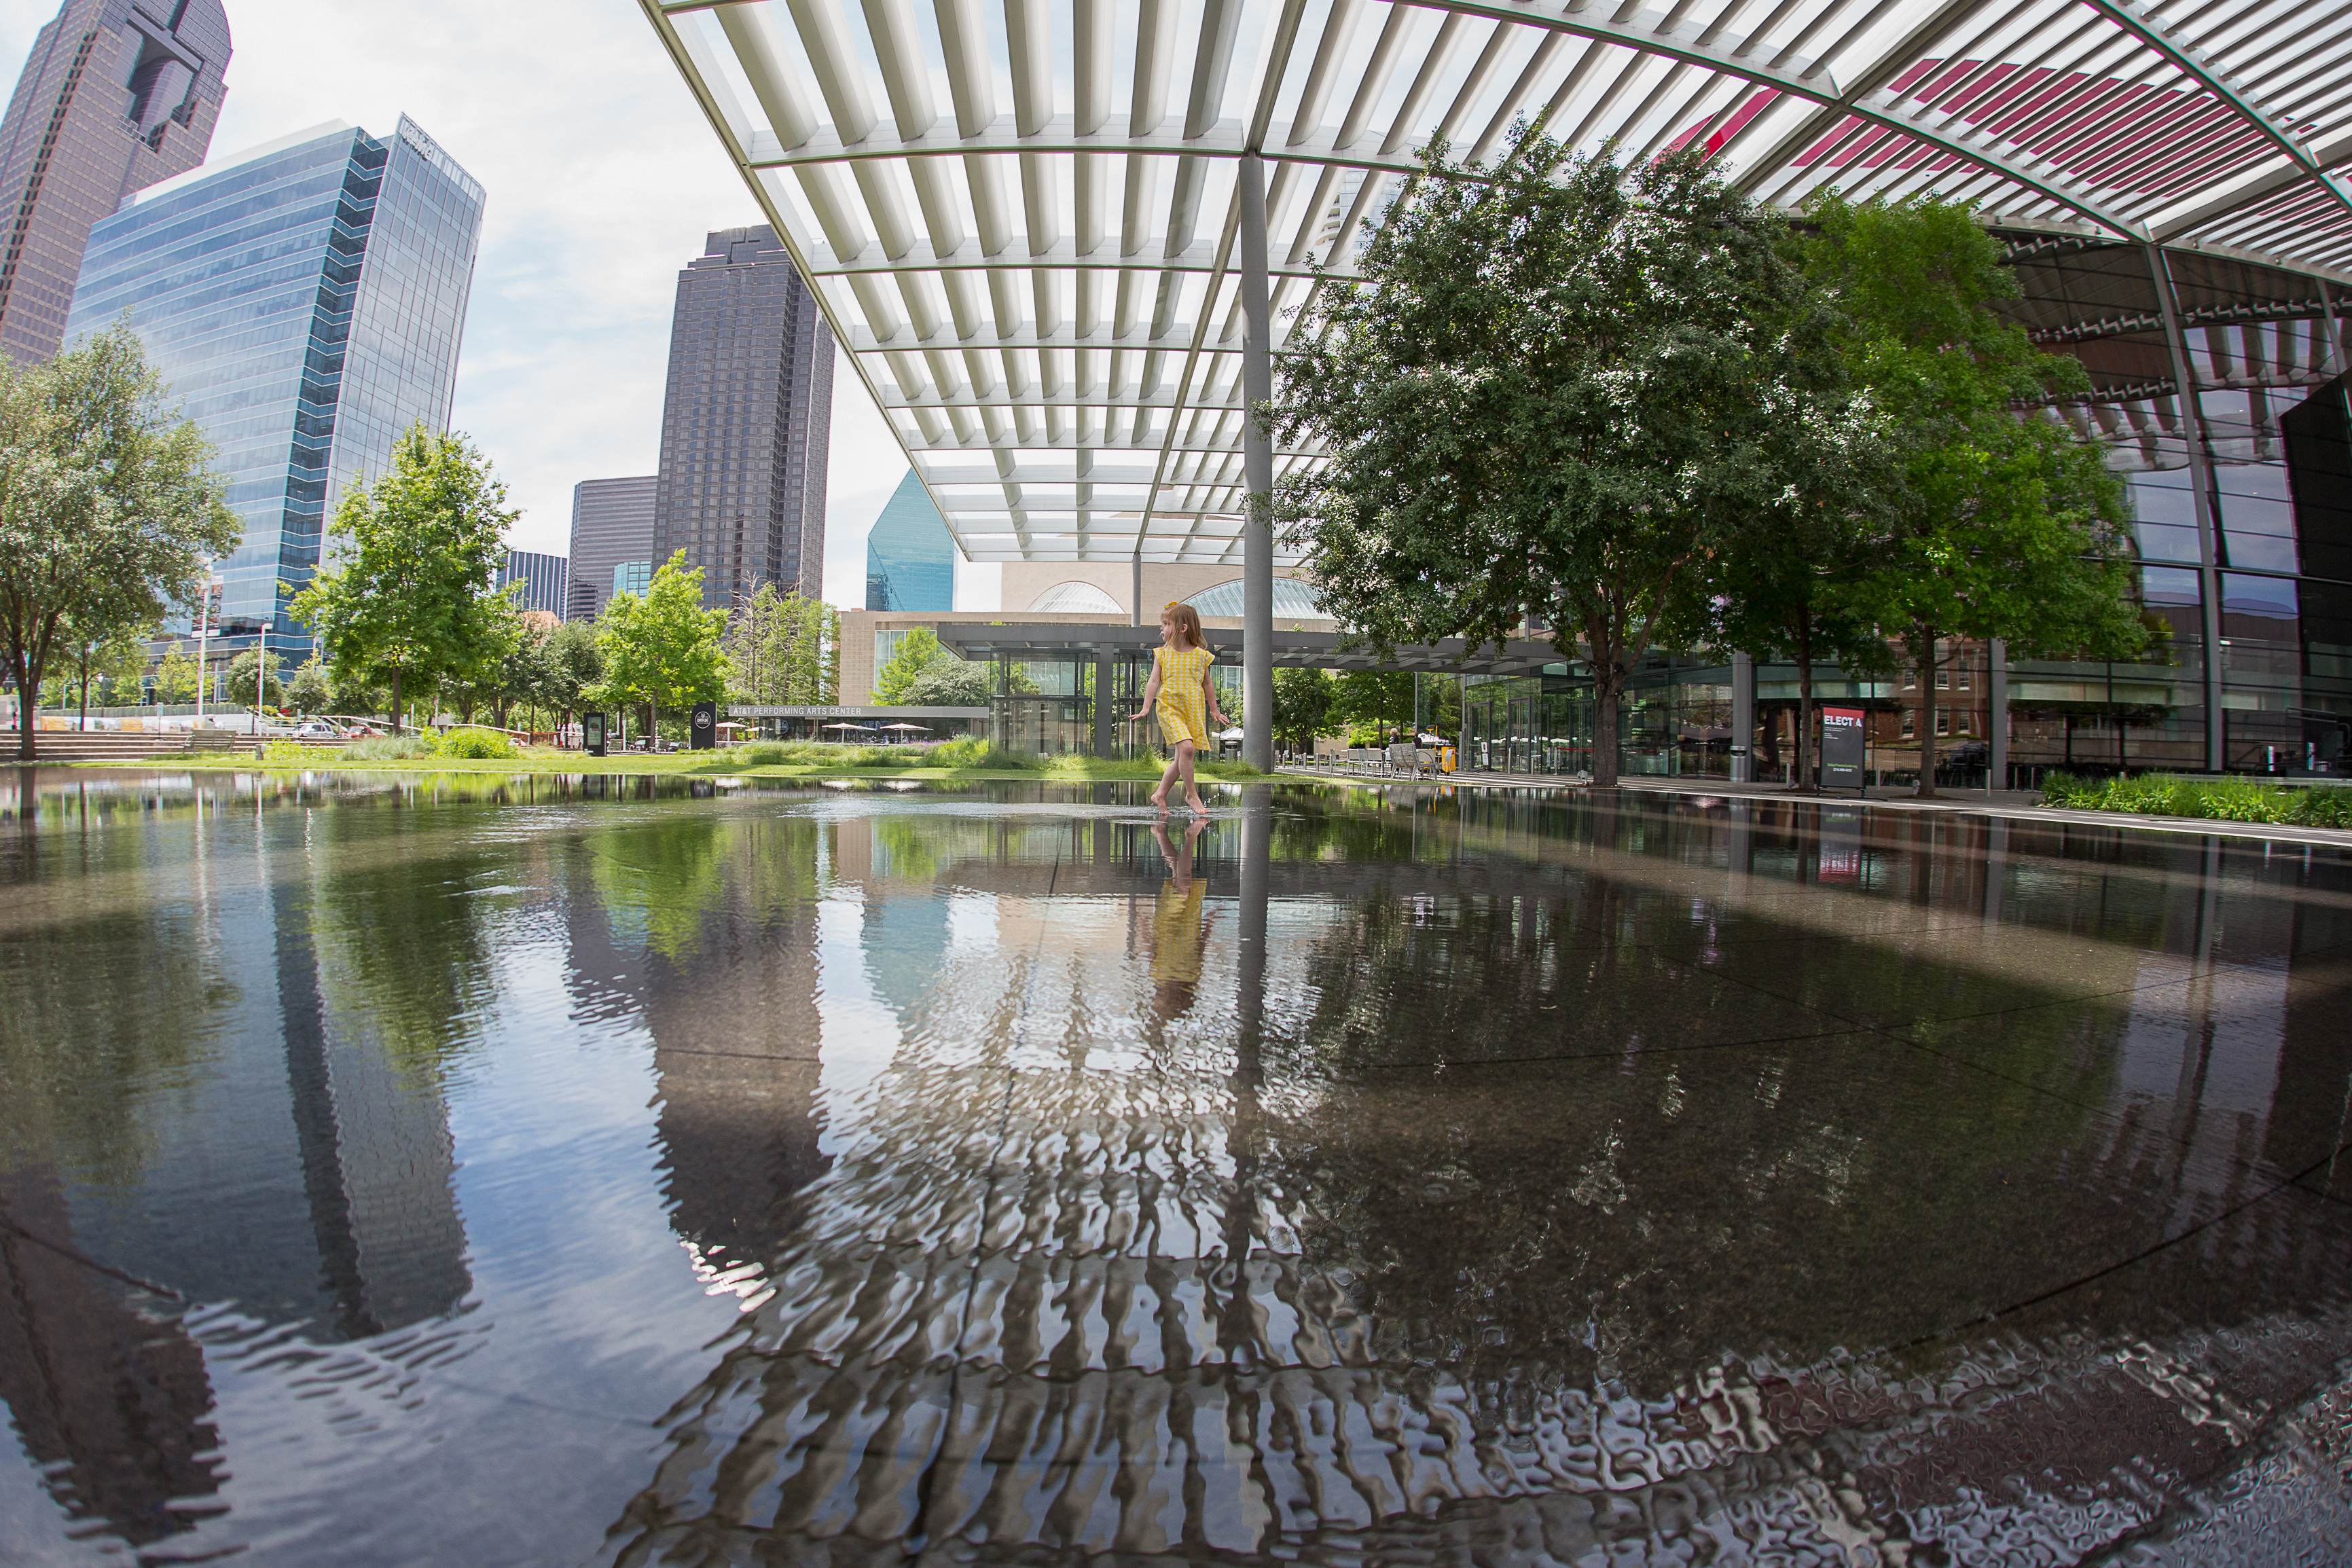
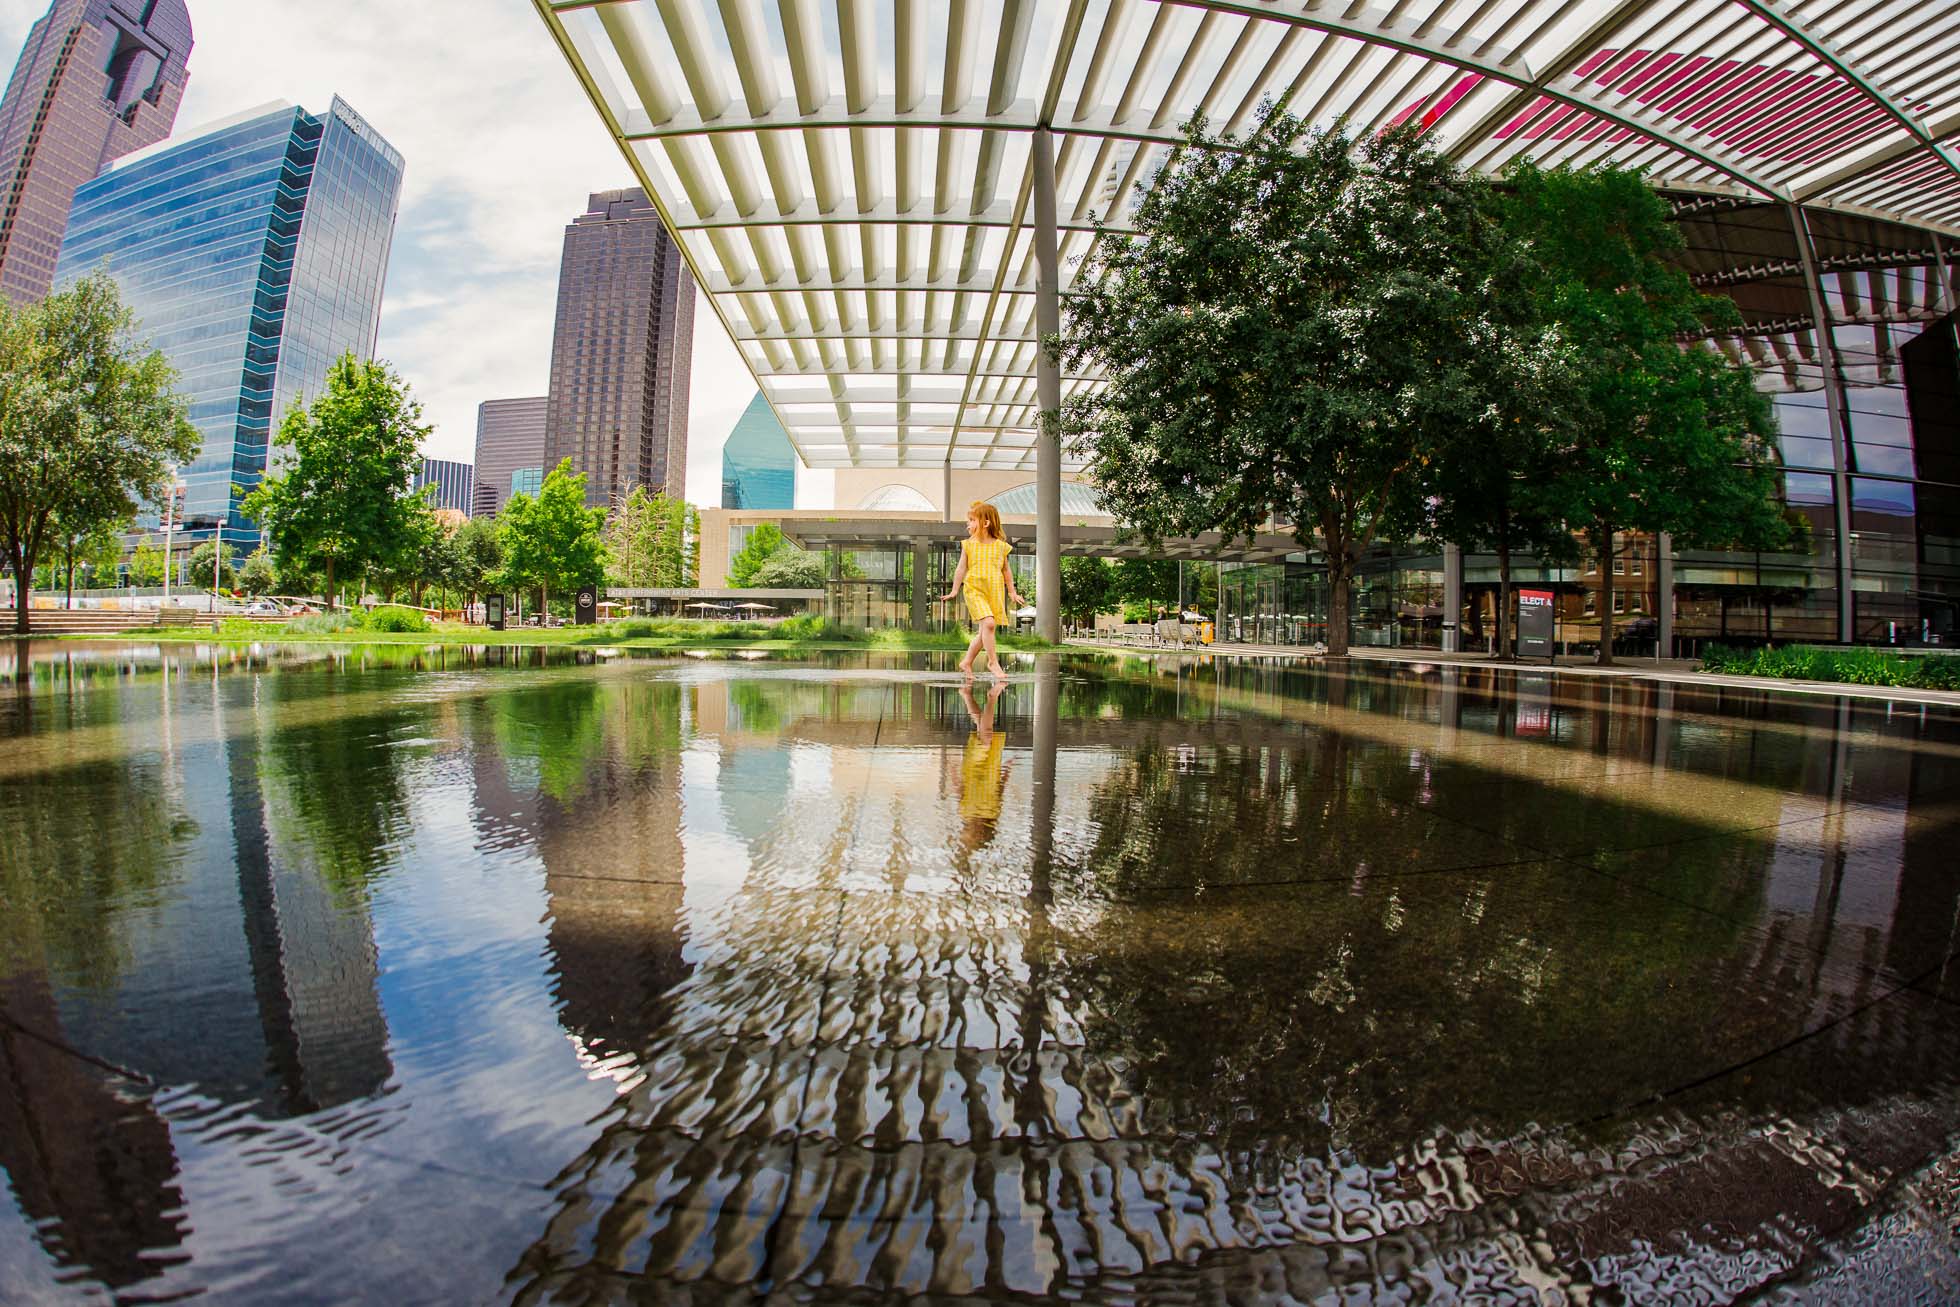
Here is my final image and it took me right at a minute to do. Now I can copy these edit adjustments and quickly sync them to other images I took at this location. Lightroom is such a powerful organization tool, editor and time saver for me.
alison bell
Beautiful. I might need to upgrade from LR4.